pax_global_header�����������������������������������������������������������������������������������0000666�0000000�0000000�00000000064�14613204507�0014514�g����������������������������������������������������������������������������������������������������ustar�00root����������������������������root����������������������������0000000�0000000������������������������������������������������������������������������������������������������������������������������������������������������������������������������52 comment=9773f7f96c66ed904eb8b2ddc09216d50b73c58c
����������������������������������������������������������������������������������������������������������������������������������������������������������������������������������������������������������������������������������������������������������������������������������������������������������������������������������������������������������������������������������������������������������������������������������������������������������������������������reference/������������������������������������������������������������������������������������������0000775�0000000�0000000�00000000000�14613204507�0013016�5����������������������������������������������������������������������������������������������������ustar�00root����������������������������root����������������������������0000000�0000000������������������������������������������������������������������������������������������������������������������������������������������������������������������������reference/How_to_Install_Java_on_Debian_10_Linux.html�����������������������������������������������0000664�0000000�0000000�00000550440�14613204507�0023217�0����������������������������������������������������������������������������������������������������ustar�00root����������������������������root����������������������������0000000�0000000������������������������������������������������������������������������������������������������������������������������������������������������������������������������
How to Install Java on Debian 10 Linux | Linuxize
How to Install Java on Debian 10 Linux
Updated
•
4 min read
In this tutorial, we will explain how to install Java (OpenJDK) on Debian 10 Linux.
Java is one of the most popular programming languages used to build different kinds of applications and systems. Applications developed in Java are scalable, flexible, and maintainable.
There are two different implementations of Java, OpenJDK and Oracle Java, with almost no differences between them except that Oracle Java has a few additional commercial features. Oracle Java License permits only non-commercial use of the software, such as personal use and development use.
The default Debian 10 repositories include two different Java packages, Java Runtime Environment (JRE) and Java Development Kit (JDK). JRE includes the Java virtual machine (JVM), classes, and binaries that allow you to run Java programs. Java developers should install JDK, which includes JRE and development/debugging tools and libraries necessary to build Java applications.
If you are not sure which Java package to install, the general recommendation is to stick to the default OpenJDK (JDK 11) version. Some Java-based applications may require a specific version of Java, so you should consult the application documentation.
If you have multiple Java versions installed on your Debian system you can check what version is set as the default one by typing:
java -version
To change the default version, use the update-alternatives command:
sudo update-alternatives --config java
The output will look something like below:
There are 2 choices for the alternative java (providing /usr/bin/java).
Selection Path Priority Status
------------------------------------------------------------
* 0 /usr/lib/jvm/java-11-openjdk-amd64/bin/java 1111 auto mode
1 /usr/lib/jvm/adoptopenjdk-8-hotspot-amd64/bin/java 1081 manual mode
2 /usr/lib/jvm/java-11-openjdk-amd64/bin/java 1111 manual mode
Press <enter> to keep the current choice[*], or type selection number:
You will be presented with a list of all installed Java versions. Enter the number of the version you want to be used as the default and press Enter.
The JAVA_HOMEenvironment variable is used by some Java applications to determine the Java installation location.
To set the JAVA_HOME environment variable, use the update-alternatives command to find where Java is installed:
sudo update-alternatives --config java
In this example, the installation paths are as follows:
OpenJDK 11 is located at /usr/lib/jvm/java-11-openjdk-amd64/bin/java
OpenJDK 8 is located at /usr/lib/jvm/adoptopenjdk-8-hotspot-amd64/bin/java
Once you found the path of your preferred Java installation, open the /etc/environment file:
sudo nano /etc/environment
Assuming you want to set JAVA_HOME to OpenJDK 11, add the following line, at the end of the file:
/etc/environment
JAVA_HOME="/usr/lib/jvm/java-11-openjdk-amd64"
For changes to take effect on your current shell you can either log out and log in or run the following source command:
source /etc/environment
Verify that the JAVA_HOME environment variable was correctly set:
echo $JAVA_HOME
You should see the path to the Java installation:
/usr/lib/jvm/java-11-openjdk-amd64
/etc/environment is a system-wide configuration file, which is used by all users. If you want to set the JAVA_HOME variable on a per-user basis, then add the line to the .bashrc or any other configuration file which is loaded when the user logs in.
The latest LTS version of OpenJDK is available in the default Debian 10 Buster repositories, and the installation is a simple and straightforward task.
If you have any questions, feel free to leave a comment.
��������������������������������������������������������������������������������������������������������������������������������������������������������������������������������������������������������������������������������reference/How_to_Install_Latest_MySQL_on_Debian10.html����������������������������������������������0000664�0000000�0000000�00000245506�14613204507�0023305�0����������������������������������������������������������������������������������������������������ustar�00root����������������������������root����������������������������0000000�0000000������������������������������������������������������������������������������������������������������������������������������������������������������������������������
How To Install the Latest MySQL on Debian 10 | DigitalOcean
Not using Debian 10?
Choose a different version or distribution.
Introduction
MySQL is a prominent open source database management system used to store and retrieve data for a wide variety of popular applications. MySQL is the M in the LAMP stack, a commonly used set of open source software that also includes Linux, the Apache web server, and the PHP programming language.
In Debian 10, MariaDB, a community fork of the MySQL project, is packaged as the default MySQL variant. While MariaDB works well in most cases, if you need features found only in Oracle’s MySQL, you can install and use packages from a repository maintained by the MySQL developers.
To install the latest version of MySQL, we’ll add this repository, install the MySQL software itself, secure the install, and finally we’ll test that MySQL is running and responding to commands.
Prerequisites
Before starting this tutorial, you will need:
One Debian 10 server set up by following this initial server setup guide, including a non-root user with sudo privileges and a firewall.
Step 1 — Adding the MySQL Software Repository
The MySQL developers provide a .deb package that handles configuring and installing the official MySQL software repositories. Once the repositories are set up, we’ll be able to use Debian’s standard apt command to install the software.
Before we do this, we need to install the prerequisite GnuPG package, an open-source implementation of the OpenPGP standard.
Let’s begin by updating the local package index to reflect the latest upstream changes:
sudo apt update
Then, install the gnupg package:
sudo apt install gnupg
After confirming the installation, apt will install gnupg and its dependencies.
Next, we’ll download the MySQL .deb package with wget and then install it using the dpkg command.
Load the MySQL download page in your web browser. Find the Download button in the lower-right corner and click through to the next page. This page will prompt you to log in or sign up for an Oracle web account. We can skip that and instead look for the link that says No thanks, just start my download. Right-click the link and select Copy Link Address (this option may be worded differently, depending on your browser).
Now we’re going to download the file. On your server, move to a directory you can write to. Download the file using wget, remembering to paste the address you just copied in place of the highlighted portion below:
The file should now be downloaded in our current directory. List the files to make sure:
ls
You should see the filename listed:
Output
mysql-apt-config_0.8.13-1_all.deb
. . .
Now we’re ready to install:
sudo dpkg -i mysql-apt-config*
dpkg is used to install, remove, and inspect .deb software packages. The -i flag indicates that we’d like to install from the specified file.
During the installation, you’ll be presented with a configuration screen where you can specify which version of MySQL you’d prefer, along with an option to install repositories for other MySQL-related tools. The defaults will add the repository information for the latest stable version of MySQL and nothing else. This is what we want, so use the down arrow to navigate to the Ok menu option and hit ENTER.
The package will now finish adding the repository. Refresh your apt package cache to make the new software packages available:
sudo apt update
Now that we’ve added the MySQL repositories, we’re ready to install the actual MySQL server software. If you ever need to update the configuration of these repositories, just run sudo dpkg-reconfigure mysql-apt-config, select new options, and then sudo apt-get update to refresh your package cache.
Step 2 — Installing MySQL
Having added the repository and with our package cache freshly updated, we can now use apt to install the latest MySQL server package:
sudo apt install mysql-server
apt will look at all available mysql-server packages and determine that the MySQL provided package is the newest and best candidate. It will then calculate package dependencies and ask you to approve the installation. Type y then ENTER. The software will install.
You will be asked to set a root password during the configuration phase of the installation. Choose and confirm a secure password to continue. Next, a prompt will appear asking for you to select a default authentication plugin. Read the display to understand the choices. If you are not sure, choosing Use Strong Password Encryption is safer.
MySQL should be installed and running now. Let’s check using systemctl:
sudo systemctl status mysql
● mysql.service - MySQL Community Server
Loaded: loaded (/lib/systemd/system/mysql.service; enabled; vendor preset: enabled)
Active: active (running) since Thu 2019-07-25 17:20:12 UTC; 3s ago
Docs: man:mysqld(8)
http://dev.mysql.com/doc/refman/en/using-systemd.html
Process: 2673 ExecStartPre=/usr/share/mysql-8.0/mysql-systemd-start pre (code=exited, status=0/SUCCESS)
Main PID: 2709 (mysqld)
Status: "Server is operational"
Tasks: 39 (limit: 4915)
Memory: 378.4M
CGroup: /system.slice/mysql.service
└─2709 /usr/sbin/mysqld
Jul 25 17:20:10 sammy systemd[1]: Starting MySQL Community Server...
Jul 25 17:20:12 sammy systemd[1]: Started MySQL Community Server.
The Active: active (running) line means MySQL is installed and running. Now we’ll make the installation a little more secure.
Step 3 — Securing MySQL
MySQL comes with a command we can use to perform a few security-related updates on our new install. Let’s run it now:
mysql_secure_installation
This will ask you for the MySQL root password that you set during installation. Type it in and press ENTER. Now we’ll answer a series of yes or no prompts. Let’s go through them:
First, we are asked about the validate password plugin, a plugin that can automatically enforce certain password strength rules for your MySQL users. Enabling this is a decision you’ll need to make based on your individual security needs. Type y and ENTER to enable it, or just hit ENTER to skip it. If enabled, you will also be prompted to choose a level from 0–2 for how strict the password validation will be. Choose a number and hit ENTER to continue.
Next you’ll be asked if you want to change the root password. Since we just created the password when we installed MySQL, we can safely skip this. Hit ENTER to continue without updating the password.
The rest of the prompts can be answered yes. You will be asked about removing the anonymous MySQL user, disallowing remote root login, removing the test database, and reloading privilege tables to ensure the previous changes take effect properly. These are all a good idea. Type y and hit ENTER for each.
The script will exit after all the prompts are answered. Now our MySQL installation is reasonably secured. Let’s test it again by running a client that connects to the server and returns some information.
Step 4 – Testing MySQL
mysqladmin is a command line administrative client for MySQL. We’ll use it to connect to the server and output some version and status information:
mysqladmin -u root -p version
The -u root portion tells mysqladmin to log in as the MySQL root user, -p instructs the client to ask for a password, and version is the actual command we want to run.
The output will let us know what version of the MySQL server is running, its uptime, and some other status information:
Output
mysqladmin Ver 8.0.17 for Linux on x86_64 (MySQL Community Server - GPL)
Copyright (c) 2000, 2019, Oracle and/or its affiliates. All rights reserved.
Oracle is a registered trademark of Oracle Corporation and/or its
affiliates. Other names may be trademarks of their respective
owners.
Server version 8.0.17
Protocol version 10
Connection Localhost via UNIX socket
UNIX socket /var/run/mysqld/mysqld.sock
Uptime: 3 min 9 sec
Threads: 2 Questions: 10 Slow queries: 0 Opens: 128 Flush tables: 3 Open tables: 48 Queries per second avg: 0.052
This output confirms that you’ve successfully installed and secured the latest MySQL server.
Conclusion
You’ve now installed the latest stable version of MySQL, which should work for many popular applications.
Docker is an application that makes it simple and easy to run application processes in a container, which are like virtual machines, only more portable, more resource-friendly, and more dependent on the host operating system. For a detailed introduction to the different components of a Docker container, check out The Docker Ecosystem: An Introduction to Common Components.
There are two methods for installing Docker on Ubuntu 16.04. One method involves installing it on an existing installation of the operating system. The other involves spinning up a server with a tool called Docker Machine that auto-installs Docker on it.
In this tutorial, you’ll learn how to install and use it on an existing installation of Ubuntu 16.04.
Prerequisites
To follow this tutorial, you will need the following:
One Ubuntu 16.04 server set up with a non-root user with sudo privileges and a basic firewall, as explained in the Initial Setup Guide for Ubuntu 16.04
An account on Docker Hub if you wish to create your own images and push them to Docker Hub, as shown in Steps 7 and 8
Step 1 — Installing Docker
The Docker installation package available in the official Ubuntu 16.04 repository may not be the latest version. To get this latest version, install Docker from the official Docker repository. This section shows you how to do just that.
First, in order to ensure the downloads are valid, add the GPG key for the official Docker repository to your system:
Notice that docker-ce is not installed, but the candidate for installation is from the Docker repository for Ubuntu 16.04 (xenial).
Finally, install Docker:
sudo apt-get install -y docker-ce
Docker should now be installed, the daemon started, and the process enabled to start on boot. Check that it’s running:
sudo systemctl status docker
The output should be similar to the following, showing that the service is active and running:
Output
● docker.service - Docker Application Container Engine
Loaded: loaded (/lib/systemd/system/docker.service; enabled; vendor preset: enabled)
Active: active (running) since Thu 2018-10-18 20:28:23 UTC; 35s ago
Docs: https://docs.docker.com
Main PID: 13412 (dockerd)
CGroup: /system.slice/docker.service
├─13412 /usr/bin/dockerd -H fd://
└─13421 docker-containerd --config /var/run/docker/containerd/containerd.toml
Installing Docker now gives you not just the Docker service (daemon) but also the docker command line utility, or the Docker client. We’ll explore how to use the docker command later in this tutorial.
Step 2 — Executing the Docker Command Without Sudo (Optional)
By default, running the docker command requires root privileges — that is, you have to prefix the command with sudo. It can also be run by a user in the docker group, which is automatically created during the installation of Docker. If you attempt to run the docker command without prefixing it with sudo or without being in the docker group, you’ll get an output like this:
Output
docker: Cannot connect to the Docker daemon. Is the docker daemon running on this host?.
See 'docker run --help'.
If you want to avoid typing sudo whenever you run the docker command, add your username to the docker group:
sudo usermod -aG docker ${USER}
To apply the new group membership, you can log out of the server and back in, or you can type the following:
su - ${USER}
You will be prompted to enter your user’s password to continue. Afterwards, you can confirm that your user is now added to the docker group by typing:
id -nG
Output
sammy sudo docker
If you need to add a user to the docker group that you’re not logged in as, declare that username explicitly using:
sudo usermod -aG docker username
The rest of this article assumes you are running the docker command as a user in the docker user group. If you choose not to, please prepend the commands with sudo.
Step 3 — Using the Docker Command
With Docker installed and working, now’s the time to become familiar with the command line utility. Using docker consists of passing it a chain of options and commands followed by arguments. The syntax takes this form:
docker [option] [command] [arguments]
To view all available subcommands, type:
docker
As of Docker 18.06.1, the complete list of available subcommands includes:
Output
attach Attach local standard input, output, and error streams to a running container
build Build an image from a Dockerfile
commit Create a new image from a container's changes
cp Copy files/folders between a container and the local filesystem
create Create a new container
diff Inspect changes to files or directories on a container's filesystem
events Get real time events from the server
exec Run a command in a running container
export Export a container's filesystem as a tar archive
history Show the history of an image
images List images
import Import the contents from a tarball to create a filesystem image
info Display system-wide information
inspect Return low-level information on Docker objects
kill Kill one or more running containers
load Load an image from a tar archive or STDIN
login Log in to a Docker registry
logout Log out from a Docker registry
logs Fetch the logs of a container
pause Pause all processes within one or more containers
port List port mappings or a specific mapping for the container
ps List containers
pull Pull an image or a repository from a registry
push Push an image or a repository to a registry
rename Rename a container
restart Restart one or more containers
rm Remove one or more containers
rmi Remove one or more images
run Run a command in a new container
save Save one or more images to a tar archive (streamed to STDOUT by default)
search Search the Docker Hub for images
start Start one or more stopped containers
stats Display a live stream of container(s) resource usage statistics
stop Stop one or more running containers
tag Create a tag TARGET_IMAGE that refers to SOURCE_IMAGE
top Display the running processes of a container
unpause Unpause all processes within one or more containers
update Update configuration of one or more containers
version Show the Docker version information
wait Block until one or more containers stop, then print their exit codes
To view the switches available to a specific command, type:
docker docker-subcommand --help
To view system-wide information about Docker, use:
docker info
Step 4 — Working with Docker Images
Docker containers are run from Docker images. By default, it pulls these images from Docker Hub, a Docker registry managed by Docker, the company behind the Docker project. Anybody can build and host their Docker images on Docker Hub, so most applications and Linux distributions you’ll need to run Docker containers have images that are hosted on Docker Hub.
To check whether you can access and download images from Docker Hub, type:
docker run hello-world
In the output, you should see the following message, which indicates that Docker is working correctly:
Output
...
Hello from Docker!
This message shows that your installation appears to be working correctly.
...
You can search for images available on Docker Hub by using the docker command with the search subcommand. For example, to search for the Ubuntu image, type:
docker search ubuntu
The script will crawl Docker Hub and return a listing of all images whose name matches the search string. In this case, the output will be similar to this:
Output
NAME DESCRIPTION STARS OFFICIAL AUTOMATED
ubuntu Ubuntu is a Debian-based Linux operating sys… 8564 [OK]
dorowu/ubuntu-desktop-lxde-vnc Ubuntu with openssh-server and NoVNC 230 [OK]
rastasheep/ubuntu-sshd Dockerized SSH service, built on top of offi… 176 [OK]
consol/ubuntu-xfce-vnc Ubuntu container with "headless" VNC session… 129 [OK]
ansible/ubuntu14.04-ansible Ubuntu 14.04 LTS with ansible 95 [OK]
ubuntu-upstart Upstart is an event-based replacement for th… 91 [OK]
neurodebian NeuroDebian provides neuroscience research s… 54 [OK]
1and1internet/ubuntu-16-nginx-php-phpmyadmin-mysql-5 ubuntu-16-nginx-php-phpmyadmin-mysql-5 48 [OK]
ubuntu-debootstrap debootstrap --variant=minbase --components=m… 39 [OK]
nuagebec/ubuntu Simple always updated Ubuntu docker images w… 23 [OK]
tutum/ubuntu Simple Ubuntu docker images with SSH access 18
i386/ubuntu Ubuntu is a Debian-based Linux operating sys… 14
1and1internet/ubuntu-16-apache-php-7.0 ubuntu-16-apache-php-7.0 13 [OK]
ppc64le/ubuntu Ubuntu is a Debian-based Linux operating sys… 12
eclipse/ubuntu_jdk8 Ubuntu, JDK8, Maven 3, git, curl, nmap, mc, … 6 [OK]
1and1internet/ubuntu-16-nginx-php-5.6-wordpress-4 ubuntu-16-nginx-php-5.6-wordpress-4 6 [OK]
codenvy/ubuntu_jdk8 Ubuntu, JDK8, Maven 3, git, curl, nmap, mc, … 4 [OK]
darksheer/ubuntu Base Ubuntu Image -- Updated hourly 4 [OK]
pivotaldata/ubuntu A quick freshening-up of the base Ubuntu doc… 2
1and1internet/ubuntu-16-sshd ubuntu-16-sshd 1 [OK]
smartentry/ubuntu ubuntu with smartentry 1 [OK]
ossobv/ubuntu Custom ubuntu image from scratch (based on o… 0
paasmule/bosh-tools-ubuntu Ubuntu based bosh-cli 0 [OK]
1and1internet/ubuntu-16-healthcheck ubuntu-16-healthcheck 0 [OK]
pivotaldata/ubuntu-gpdb-dev Ubuntu images for GPDB development 0
In the OFFICIAL column, OK indicates an image built and supported by the company behind the project. Once you’ve identified the image that you would like to use, you can download it to your computer using the pull subcommand. Try this with the ubuntu image, like so:
docker pull ubuntu
After an image has been downloaded, you may then run a container using the downloaded image with the run subcommand. If an image has not been downloaded when docker is executed with the run subcommand, the Docker client will first download the image, then run a container using it:
docker run ubuntu
To see the images that have been downloaded to your computer, type:
docker images
The output should look similar to the following:
Output
REPOSITORY TAG IMAGE ID CREATED SIZE
ubuntu latest ea4c82dcd15a 16 hours ago 85.8MB
hello-world latest 4ab4c602aa5e 5 weeks ago 1.84kB
As you’ll see later in this tutorial, images that you use to run containers can be modified and used to generate new images, which may then be uploaded (pushed is the technical term) to Docker Hub or other Docker registries.
Step 5 — Running a Docker Container
The hello-world container you ran in the previous step is an example of a container that runs and exits after emitting a test message. Containers can be much more useful than that, and they can be interactive. After all, they are similar to virtual machines, only more resource-friendly.
As an example, let’s run a container using the latest image of Ubuntu. The combination of the -i and -t switches gives you interactive shell access into the container:
docker run -it ubuntu
Note: The default behavior for the run command is to start a new container. Once you run the preceding the command, you will open up the shell interface of a second ubuntu container.
Your command prompt should change to reflect the fact that you’re now working inside the container and should take this form:
Output
root@9b0db8a30ad1:/#
Note: Remember the container id in the command prompt. In the preceding example, it is 9b0db8a30ad1. You’ll need that container ID later to identify the container when you want to remove it.
Now you can run any command inside the container. For example, let’s update the package database inside the container. You don’t need to prefix any command with sudo, because you’re operating inside the container as the root user:
apt-get update
Then install any application in it. Let’s install Node.js:
apt-get install -y nodejs
This installs Node.js in the container from the official Ubuntu repository. When the installation finishes, verify that Node.js is installed:
node -v
You’ll see the version number displayed in your terminal:
Output
v8.10.0
Any changes you make inside the container only apply to that container.
To exit the container, type exit at the prompt.
Let’s look at managing the containers on our system next.
Step 6 — Managing Docker Containers
After using Docker for a while, you’ll have many active (running) and inactive containers on your computer. To view the active ones, use:
docker ps
You will see output similar to the following:
Output
CONTAINER ID IMAGE COMMAND CREATED
In this tutorial, you started three containers; one from the hello-world image and two from the ubuntu image. These containers are no longer running, but they still exist on your system.
To view all containers — active and inactive — run docker ps with the -a switch:
docker ps -a
You’ll see output similar to this:
Output
CONTAINER ID IMAGE COMMAND CREATED STATUS PORTS NAMES
9b0db8a30ad1 ubuntu "/bin/bash" 21 minutes ago Exited (0) About a minute ago xenodochial_neumann
d7851eb12e23 ubuntu "/bin/bash" 24 minutes ago Exited (0) 24 minutes ago boring_chebyshev
d54945b6510b hello-world "/hello" 32 minutes ago Exited (0) 32 minutes ago youthful_roentgen
To view the latest container you created, pass it the -l switch:
docker ps -l
Output
CONTAINER ID IMAGE COMMAND CREATED STATUS PORTS NAMES
9b0db8a30ad1 ubuntu "/bin/bash" 22 minutes ago Exited (127) About a minute ago xenodochial_neumann
To start a stopped container, use docker start, followed by the container ID or the container’s name. Let’s start the Ubuntu-based container with the ID of 9b0db8a30ad1:
docker start 9b0db8a30ad1
The container will start, and you can use docker ps to see its status:
Output
CONTAINER ID IMAGE COMMAND CREATED STATUS PORTS NAMES
9b0db8a30ad1 ubuntu "/bin/bash" 23 minutes ago Up 11 seconds xenodochial_neumann
To stop a running container, use docker stop, followed by the container ID or name. This time, we’ll use the name that Docker assigned the container, which is xenodochial_neumann:
docker stop xenodochial_neumann
Once you’ve decided you no longer need a container anymore, remove it with the docker rm command, again using either the container ID or the name. Use the docker ps -a command to find the container ID or name for the container associated with the hello-world image and remove it.
docker rm youthful_roentgen
You can start a new container and give it a name using the --name switch. You can also use the --rm switch to create a container that removes itself when it’s stopped. See the docker run help command for more information on these options and others.
Containers can be turned into images which you can use to build new containers. Let’s look at how that works.
Step 7 — Committing Changes in a Container to a Docker Image
When you start up a Docker image, you can create, modify, and delete files just like you can with a virtual machine. The changes that you make will only apply to that container. You can start and stop it, but once you destroy it with the docker rm command, the changes will be lost for good.
This section shows you how to save the state of a container as a new Docker image.
After installing Node.js inside the Ubuntu container, you now have a container running off an image, but the container is different from the image you used to create it. But you might want to reuse this Node.js container as the basis for new images later.
To do this, commit the changes to a new Docker image instance using the following command structure:
docker commit -m "What did you do to the image" -a "Author Name" container-idrepository/new_image_name
The -m switch is for the commit message that helps you and others know what changes you made, while -a is used to specify the author. The container ID is the one you noted earlier in the tutorial when you started the interactive Docker session. Unless you created additional repositories on Docker Hub, the repository is usually your Docker Hub username.
For example, for the user sammy, with the container ID of d9b100f2f636, the command would be:
docker commit -m "added node.js" -a "sammy" d9b100f2f636sammy/ubuntu-nodejs
Note: When you commit an image, the new image is saved locally, that is, on your computer. Later in this tutorial, you’ll learn how to push an image to a Docker registry like Docker Hub so that it can be assessed and used by you and others.
After that operation is completed, listing the Docker images now on your computer should show the new image, as well as the old one that it was derived from:
docker images
The output should be similar to this:
Output
REPOSITORY TAG IMAGE ID CREATED SIZE
sammy/ubuntu-nodejs latest 6a1784a63edf 2 minutes ago 170MB
ubuntu latest ea4c82dcd15a 17 hours ago 85.8MB
hello-world latest 4ab4c602aa5e 5 weeks ago 1.84kB
In the above example, ubuntu-nodejs is the new image, which was derived from the existing ubuntu image from Docker Hub. The size difference reflects the changes that were made. In this example, the change was that Node.js was installed. Next time you need to run a container using Ubuntu with Node.js pre-installed, you can just use the new image.
You can also build images from a Dockerfile, which lets you automate the installation of software in a new image. However, that’s outside the scope of this tutorial.
Now let’s share the new image with others so they can create containers from it.
Step 8 — Pushing Docker Images to a Docker Repository
The next logical step after creating a new image from an existing image is to share it with a select few of your friends, the whole world on Docker Hub, or another Docker registry that you have access to. To push an image to Docker Hub or any other Docker registry, you must have an account there.
You’ll be prompted to authenticate using your Docker Hub password. If you specified the correct password, authentication should succeed.
Note: If your Docker registry username is different from the local username you used to create the image, you will have to tag your image with your registry username. For the example given in the last step, you would type:
docker tag sammy/ubuntu-nodejs docker-registry-username/ubuntu-nodejs
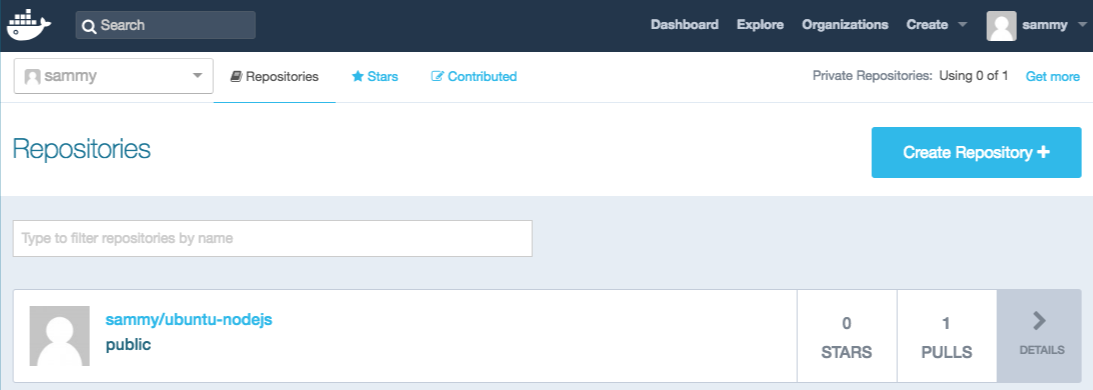
After pushing an image to a registry, it should be listed on your account’s dashboard, like that shown in the image below.
If a push attempt results in the following error, it is likely that you are not logged in:
Output
The push refers to a repository [docker.io/sammy/ubuntu-nodejs]
e3fbbfb44187: Preparing
5f70bf18a086: Preparing
a3b5c80a4eba: Preparing
7f18b442972b: Preparing
3ce512daaf78: Preparing
7aae4540b42d: Waiting
unauthorized: authentication required
Log in, then repeat the push attempt.
Conclusion
In this tutorial, you’ve learned the basics to get you started working with Docker on Ubuntu 16.04. Like most open source projects, Docker is built from a fast-developing codebase, so make a habit of visiting the project’s blog page for the latest information.
For further exploration, check out the other Docker tutorials in the DigitalOcean Community.
����������������������������������������������������������������������������������������reference/How_to_Remove_Docker_Images_Containers_and_Volumes.html�����������������������������������0000664�0000000�0000000�00000266525�14613204507�0025775�0����������������������������������������������������������������������������������������������������ustar�00root����������������������������root����������������������������0000000�0000000������������������������������������������������������������������������������������������������������������������������������������������������������������������������
How To Remove Docker Images, Containers, and Volumes | DigitalOcean
Docker makes it easy to wrap your applications and services in containers so you can run them anywhere. As you work with Docker, however, it’s also easy to accumulate an excessive number of unused images, containers, and data volumes that clutter the output and consume disk space.
Docker gives you all the tools you need to clean up your system from the command line. This cheat sheet-style guide provides a quick reference to commands that are useful for freeing disk space and keeping your system organized by removing unused Docker images, containers, and volumes.
How to Use This Guide:
This guide is in cheat sheet format with self-contained command-line snippets
Jump to any section that is relevant to the task you are trying to complete.
The command substitution syntax, command $(command), used in the commands is available in many popular shells such as bash, zsh, and Windows Powershell.
Purging All Unused or Dangling Images, Containers, Volumes, and Networks
Docker provides a single command that will clean up any resources — images, containers, volumes, and networks — that are dangling (not associated with a container):
docker system prune
To additionally remove any stopped containers and all unused images (not just dangling images), add the -a flag to the command:
docker system prune -a
Removing Docker Images
Remove one or more specific images
Use the docker images command with the -a flag to locate the ID of the images you want to remove. This will show you every image, including intermediate image layers. When you’ve located the images you want to delete, you can pass their ID or tag to docker rmi:
List:
docker images -a
Remove:
docker rmi ImageImage
Remove dangling images
Docker images consist of multiple layers. Dangling images are layers that have no relationship to any tagged images. They no longer serve a purpose and consume disk space. They can be located by adding the filter flag, -f with a value of dangling=true to the docker images command. When you’re sure you want to delete them, you can use the docker images purge command:
Note: If you build an image without tagging it, the image will appear on the list of dangling images because it has no association with a tagged image. You can avoid this situation by providing a tag when you build, and you can retroactively tag an images with the docker tag command.
List:
docker images -f dangling=true
Remove:
docker images purge
Removing images according to a pattern
You can find all the images that match a pattern using a combination of docker images and grep. Once you’re satisfied, you can delete them by using awk to pass the IDs to docker rmi. Note that these utilities are not supplied by Docker and are not necessarily available on all systems:
All the Docker images on a system can be listed by adding -a to the docker images command. Once you’re sure you want to delete them all, you can add the -q flag to pass the Image ID to docker rmi:
List:
docker images -a
Remove:
docker rmi $(docker images -a -q)
Removing Containers
Remove one or more specific containers
Use the docker ps command with the -a flag to locate the name or ID of the containers you want to remove:
List:
docker ps -a
Remove:
docker rm ID_or_NameID_or_Name
Remove a container upon exit
If you know when you’re creating a container that you won’t want to keep it around once you’re done, you can run docker run --rm to automatically delete it when it exits.
Run and Remove:
docker run --rm image_name
Remove all exited containers
You can locate containers using docker ps -a and filter them by their status: created, restarting, running, paused, or exited. To review the list of exited containers, use the -f flag to filter based on status. When you’ve verified you want to remove those containers, using -q to pass the IDs to the docker rm command.
List:
docker ps -a -f status=exited
Remove:
docker rm $(docker ps -a -f status=exited -q)
Remove containers using more than one filter
Docker filters can be combined by repeating the filter flag with an additional value. This results in a list of containers that meet either condition. For example, if you want to delete all containers marked as either Created (a state which can result when you run a container with an invalid command) or Exited, you can use two filters:
List:
docker ps -a -f status=exited -f status=created
Remove:
docker rm $(docker ps -a -f status=exited -f status=created -q)
Remove containers according to a pattern
You can find all the containers that match a pattern using a combination of docker ps and grep. When you’re satisfied that you have the list you want to delete, you can use awk and xargs to supply the ID to docker rmi. Note that these utilities are not supplied by Docker and not necessarily available on all systems:
You can review the containers on your system with docker ps. Adding the -a flag will show all containers. When you’re sure you want to delete them, you can add the -q flag to supply the IDs to the docker stop and docker rm commands:
List:
docker ps -a
Remove:
docker stop $(docker ps -a -q)
docker rm $(docker ps -a -q)
Removing Volumes
Remove one or more specific volumes - Docker 1.9 and later
Use the docker volume ls command to locate the volume name or names you wish to delete. Then you can remove one or more volumes with the docker volume rm command:
List:
docker volume ls
Remove:
docker volume rm volume_namevolume_name
Remove dangling volumes - Docker 1.9 and later
Since the point of volumes is to exist independent from containers, when a container is removed, a volume is not automatically removed at the same time. When a volume exists and is no longer connected to any containers, it’s called a dangling volume. To locate them to confirm you want to remove them, you can use the docker volume ls command with a filter to limit the results to dangling volumes. When you’re satisfied with the list, you can remove them all with docker volume prune:
List:
docker volume ls -f dangling=true
Remove:
docker volume prune
Remove a container and its volume
If you created an unnamed volume, it can be deleted at the same time as the container with the -v flag. Note that this only works with unnamed volumes. When the container is successfully removed, its ID is displayed. Note that no reference is made to the removal of the volume. If it is unnamed, it is silently removed from the system. If it is named, it silently stays present.
Remove:
docker rm -v container_name
Conclusion
This guide covers some of the common commands used to remove images, containers, and volumes with Docker. There are many other combinations and flags that can be used with each. For a comprehensive guide to what’s available, see the Docker documentation for docker system prune, docker rmi, docker rm and docker volume rm. If there are common cleanup tasks you’d like to see in the guide, please ask or make suggestions in the comments.
���������������������������������������������������������������������������������������������������������������������������������������������������������������������������reference/How_to_install_Hadoop_in_stand_alone_mode_on_Debian9.html���������������������������������0000664�0000000�0000000�00000262213�14613204507�0026261�0����������������������������������������������������������������������������������������������������ustar�00root����������������������������root����������������������������0000000�0000000������������������������������������������������������������������������������������������������������������������������������������������������������������������������
How to Install Hadoop in Stand-Alone Mode on Debian 9 | DigitalOcean
Not using Debian 9?
Choose a different version or distribution.
Introduction
Hadoop is a Java-based programming framework that supports the processing and storage of extremely large datasets on a cluster of inexpensive machines. It was the first major open source project in the big data playing field and is sponsored by the Apache Software Foundation.
Hadoop is comprised of four main layers:
Hadoop Common is the collection of utilities and libraries that support other Hadoop modules.
HDFS, which stands for Hadoop Distributed File System, is responsible for persisting data to disk.
YARN, short for Yet Another Resource Negotiator, is the “operating system” for HDFS.
MapReduce is the original processing model for Hadoop clusters. It distributes work within the cluster or map, then organizes and reduces the results from the nodes into a response to a query. Many other processing models are available for the 3.x version of Hadoop.
Hadoop clusters are relatively complex to set up, so the project includes a stand-alone mode which is suitable for learning about Hadoop, performing simple operations, and debugging.
In this tutorial, you’ll install Hadoop in stand-alone mode and run one of the example example MapReduce programs it includes to verify the installation.
A Debian 9 server with a non-root user with sudo privileges and a firewall, which you can set up by following the Initial Server Setup with Debian 9 tutorial.
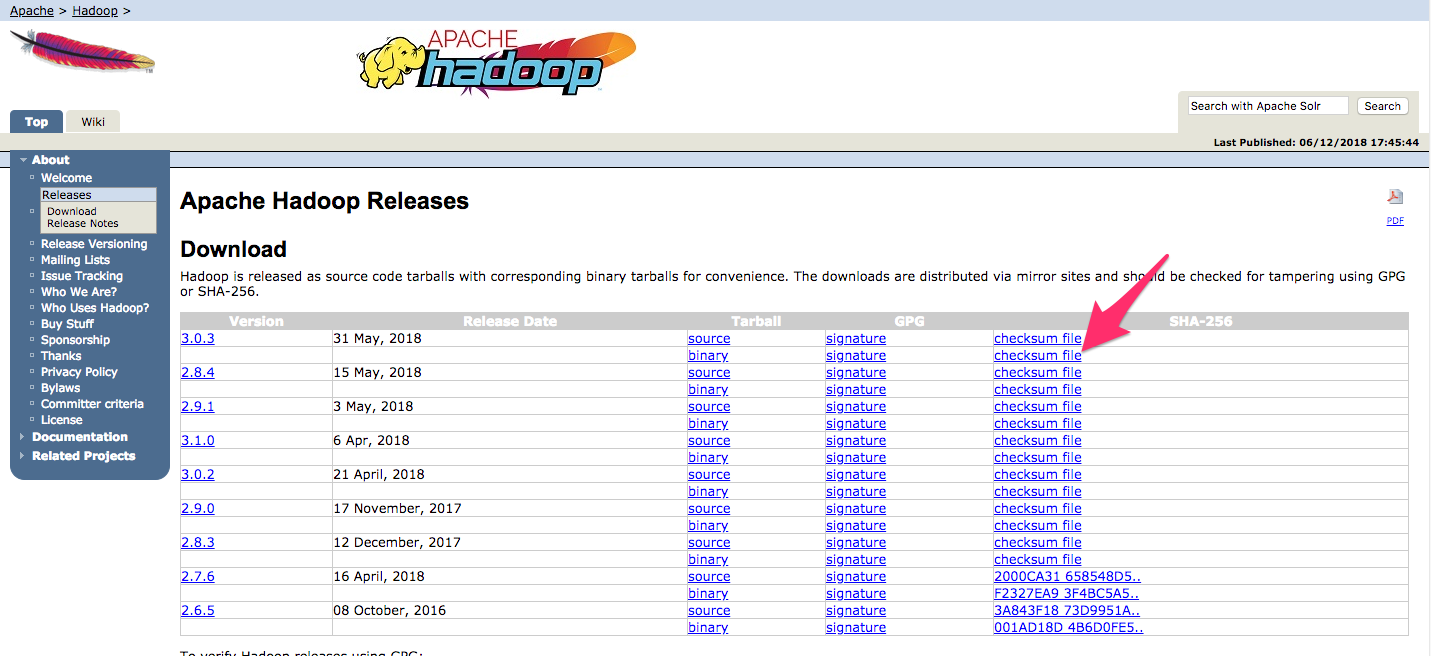
Note: The Apache website will direct you to the best mirror dynamically, so your URL may not match the URL above.
In order to ensure that the file you downloaded hasn’t been altered, do a quick check using SHA-256. Return to the releases page, then right-click and copy the link to the checksum file for the release binary you downloaded:
Again, use wget on your server to download the file:
You can safely ignore the difference in case and the spaces. The output of the command you ran against the file we downloaded from the mirror should match the value in the file you downloaded from apache.org.
Now that you’ve verified that the file wasn’t corrupted or changed, use the tar command with the -x flag to extract, -z to uncompress, -v for verbose output, and -f to specify that you’re extracting the archive from a file. Use tab-completion or substitute the correct version number in the command below:
tar -xzvf hadoop-3.0.3.tar.gz
Finally, move the extracted files into /usr/local, the appropriate place for locally installed software. Change the version number, if needed, to match the version you downloaded.
sudo mv hadoop-3.0.3 /usr/local/hadoop
With the software in place, we’re ready to configure its environment.
Step 2 — Running Hadoop
Let’s make sure Hadoop runs. Execute the following command to launch Hadoop and display its help options:
/usr/local/hadoop/bin/hadoop
You’ll see the following output, which lets you know you’ve successfully configured Hadoop to run in stand-alone mode.
Output
Usage: hadoop [OPTIONS] SUBCOMMAND [SUBCOMMAND OPTIONS]
or hadoop [OPTIONS] CLASSNAME [CLASSNAME OPTIONS]
where CLASSNAME is a user-provided Java class
OPTIONS is none or any of:
--config dir Hadoop config directory
--debug turn on shell script debug mode
--help usage information
buildpaths attempt to add class files from build tree
hostnames list[,of,host,names] hosts to use in slave mode
hosts filename list of hosts to use in slave mode
loglevel level set the log4j level for this command
workers turn on worker mode
SUBCOMMAND is one of:
. . .
We’ll ensure that it is functioning properly by running the example MapReduce program it ships with. To do so, create a directory called input in your home directory and copy Hadoop’s configuration files into it to use those files as our data.
mkdir ~/input
cp /usr/local/hadoop/etc/hadoop/*.xml ~/input
Next, we’ll run the MapReduce hadoop-mapreduce-examples program, a Java archive with several options. We’ll invoke its grep program, one of the many examples included in hadoop-mapreduce-examples, followed by the input directory, input and the output directory grep_example. The MapReduce grep program will count the matches of a literal word or regular expression. Finally, we’ll supply the regular expression allowed[.]* to find occurrences of the word allowed within or at the end of a declarative sentence. The expression is case-sensitive, so we wouldn’t find the word if it were capitalized at the beginning of a sentence.
Execute the following command:
/usr/local/hadoop/bin/hadoop jar /usr/local/hadoop/share/hadoop/mapreduce/hadoop-mapreduce-examples-3.0.3.jar grep ~/input ~/grep_example 'allowed[.]*'
When the task completes, it provides a summary of what has been processed and errors it has encountered, but this doesn’t contain the actual results:
Output
. . .
File System Counters
FILE: Number of bytes read=1330690
FILE: Number of bytes written=3128841
FILE: Number of read operations=0
FILE: Number of large read operations=0
FILE: Number of write operations=0
Map-Reduce Framework
Map input records=2
Map output records=2
Map output bytes=33
Map output materialized bytes=43
Input split bytes=115
Combine input records=0
Combine output records=0
Reduce input groups=2
Reduce shuffle bytes=43
Reduce input records=2
Reduce output records=2
Spilled Records=4
Shuffled Maps =1
Failed Shuffles=0
Merged Map outputs=1
GC time elapsed (ms)=3
Total committed heap usage (bytes)=478150656
Shuffle Errors
BAD_ID=0
CONNECTION=0
IO_ERROR=0
WRONG_LENGTH=0
WRONG_MAP=0
WRONG_REDUCE=0
File Input Format Counters
Bytes Read=147
File Output Format Counters
Bytes Written=34
The results are stored in the ~/grep_example directory.
If this output directory already exists, the program will fail, and rather than seeing the summary, you’ll see something like this:
Output
. . .
at java.base/java.lang.reflect.Method.invoke(Method.java:564)
at org.apache.hadoop.util.RunJar.run(RunJar.java:244)
at org.apache.hadoop.util.RunJar.main(RunJar.java:158)
Check the results by running cat on the output directory:
cat ~/grep_example/*
You’ll see this output:
Output
19 allowed.
1 allowed
The MapReduce task found 19 occurrences of the word allowed followed by a period and one occurrence where it was not. Running the example program has verified that our stand-alone installation is working properly and that non-privileged users on the system can run Hadoop for exploration or debugging.
Conclusion
In this tutorial, we’ve installed Hadoop in stand-alone mode and verified it by running an example program it provided. To learn how to write your own MapReduce programs, visit Apache Hadoop’s MapReduce tutorial which walks through the code behind the example you used in this tutorial. When you’re ready to set up a cluster, see the Apache Foundation Hadoop Cluster Setup guide.
In this tutorial we will show you how to install Apache Hadoop on Debian 9. For those of you who didn’t know, Apache Hadoop is an open source framework used for distributed storage as well as distributed processing of big data on clusters of computers which runs on commodity hardwares. Hadoop stores data in Hadoop Distributed File System (HDFS) and the processing of these data is done using MapReduce. YARN provides an API for requesting and allocating resources in the Hadoop cluster.
This article assumes you have at least basic knowledge of Linux, know how to use the shell, and most importantly, you host your site on your own VPS. The installation is quite simple and assumes you are running in the root account, if not you may need to add ‘sudo’ to the commands to get root privileges. I will show you through the step by step installation Apache Hadoop on a Debian 9 (Stretch) server.
Install Apache Hadoop on Debian 9 Stretch
Step 1. Before we install any software, it’s important to make sure your system is up to date by running these following apt-get commands in the terminal:
1
2
apt-getupdate
apt-getupgrade
Step 2. Installing Java (OpenJDK).
Apache Hadoop requires Java version 8 and above. So, you can choose to install either OpenJDK or Oracle JDK:
Apply environmental variables to current running session:
1
source~/.bashrc
Now edit $HADOOP_HOME/etc/hadoop/hadoop-env.sh file and set JAVA_HOME environment variable:
1
exportJAVA_HOME=/usr/jdk1.8.0_192/
Hadoop has many of configuration files, which need to configure as per requirements of your hadoop infrastructure. Let’s start with the configuration with basic Hadoop single node cluster setup:
Now format namenode using the following command, do not forget to check the storage directory:
1
hdfsnamenode-format
Start all hadoop services use the following command:
1
2
3
cd$HADOOP_HOME/sbin/
start-dfs.sh
start-yarn.sh
You should observe the output to ascertain that it tries to start datanode on slave nodes one by one. To check if all services are started well using ‘jps‘ command:
1
jps
Step 5. Setup Firewall for Apache Hadoop.
Allow Apache Hadoop through the firewall:
1
2
3
ufwallow50070/tcp
ufwallow8088/tcp
ufwreload
Step 6. Accessing Apache Hadoop.
Apache Hadoop will be available on HTTP port 8088 and port 50070 by default. Open your favorite browser and navigate to http://yourdomain.com:50070 or http://server-ip:50070.
Congratulation’s! You have successfully installed Apache Hadoop. Thanks for using this tutorial for installing Apache Hadoop in Debian 9 Stretch systems. For additional help or useful information, we recommend you to check the official Apache Hadoop web site.
VPS Manage Service Offer
If you don’t have time to do all of this stuff, or if this is not your area of expertise, we offer a service to do “VPS Manage Service Offer”, starting from $10 (Paypal payment). Please contact us to get a best deal!
Do NOT follow this link or you will be banned from the site!�������������������������������������������������������������������������������������������������������������������������������������������������������������������������������������������������������������������������������������������������������������������������������������������������������������������������������������������������������������������������������������������������������������������������������������������������������reference/Manipulating_Packages_with_dpkg.html������������������������������������������������������0000664�0000000�0000000�00000106447�14613204507�0022206�0����������������������������������������������������������������������������������������������������ustar�00root����������������������������root����������������������������0000000�0000000������������������������������������������������������������������������������������������������������������������������������������������������������������������������
5.4. Manipulating Packages with dpkg
dpkg is the base command for handling Debian packages on the system. If you have .deb packages, it is dpkg that allows installation or analysis of their contents. But this program only has a partial view of the Debian universe: it knows what is installed on the system, and whatever it is given on the command line, but knows nothing of the other available packages. As such, it will fail if a dependency is not met. Tools such as apt and aptitude, on the contrary, will create a list of dependencies to install everything as automatically as possible.
NOTEdpkg or apt?
dpkg should be seen as a system tool (backend), and apt as a tool closer to the user, which overcomes the limitations of the former. These tools work together, each one with its particularities, suited to specific tasks.
5.4.1. Installing Packages
dpkg is, above all, the tool for installing an already available Debian package (because it does not download anything). To do this, we use its -i or --install option.
Example 5.2. Installation of a package with dpkg
# dpkg -i man-db_2.8.5-2_amd64.deb(Reading database ... 14913 files and directories currently installed.)
Preparing to unpack .../man-db_2.8.5-2_amd64.deb ...
Unpacking man-db (2.8.5-2) over (2.8.5-2) ...
Setting up man-db (2.8.5-2) ...
Updating database of manual pages ...
Processing triggers for mime-support (3.62) ...
We can see the different steps performed by dpkg; we know, thus, at what point any error may have occurred. The installation can also be effected in two stages: first unpacking, then configuration. apt takes advantage of this, limiting the number of calls to dpkg (since each call is costly, due to loading of the database in memory, especially the list of already installed files).
Example 5.3. Separate unpacking and configuration
# dpkg --unpack man-db_2.8.5-2_amd64.deb(Reading database ... 14937 files and directories currently installed.)
Preparing to unpack man-db_2.8.5-2_amd64.deb ...
Unpacking man-db (2.8.5-2) over (2.8.5-2) ...
Processing triggers for mime-support (3.62) ...
# dpkg --configure man-dbSetting up man-db (2.8.5-2) ...
Updating database of manual pages ...
Sometimes dpkg will fail to install a package and return an error; if the user orders it to ignore this, it will only issue a warning; it is for this reason that we have the different --force-* options. The dpkg --force-help command, or documentation of this command, will give a complete list of these options. The most frequent error, which you are bound to encounter sooner or later, is a file collision. When a package contains a file that is already installed by another package, dpkg will refuse to install it. The following messages will then appear:
Unpacking libgdm (from .../libgdm_3.8.3-2_amd64.deb) ...
dpkg: error processing /var/cache/apt/archives/libgdm_3.8.3-2_amd64.deb (--unpack):
trying to overwrite '/usr/bin/gdmflexiserver', which is also in package gdm3 3.4.1-9
In this case, if you think that replacing this file is not a significant risk to the stability of your system (which is usually the case), you can use the option --force-overwrite, which tells dpkg to ignore this error and overwrite the file.
While there are many available --force-* options, only --force-overwrite is likely to be used regularly. These options only exist for exceptional situations, and it is better to leave them alone as much as possible in order to respect the rules imposed by the packaging mechanism. Do not forget, these rules ensure the consistency and stability of your system.
CAUTION Effective use of --force-*
If you are not careful, the use of an option --force-* can lead to a system where the APT family of commands will refuse to function. In effect, some of these options allow installation of a package when a dependency is not met, or when there is a conflict. The result is an inconsistent system from the point of view of dependencies, and the APT commands will refuse to execute any action except those that will bring the system back to a consistent state (this often consists of installing the missing dependency or removing a problematic package). This often results in a message like this one, obtained after installing a new version of rdesktop while ignoring its dependency on a newer version of the libc6:
# apt full-upgrade
[...]
You might want to run 'apt-get -f install' to correct these.
The following packages have unmet dependencies:
rdesktop: Depends: libc6 (>= 2.5) but 2.3.6.ds1-13etch7 is installed
E: Unmet dependencies. Try using -f.
A courageous administrator who is certain of the correctness of their analysis may choose to ignore a dependency or conflict and use the corresponding --force-* option. In this case, if they want to be able to continue to use apt or aptitude, they must edit /var/lib/dpkg/status to delete/modify the dependency, or conflict, that they chose to override.
This manipulation is an ugly hack, and should never be used, except in the most extreme case of necessity. Quite frequently, a more fitting solution is to recompile the package that is causing the problem (see Section 15.1, “Rebuilding a Package from its Sources”) or use a new version (potentially corrected) from a repository such as the stable-backports one (see Section 6.1.2.4, “Stable Backports”).
5.4.2. Package Removal
Invoking dpkg with the -r or --remove option, followed by the name of a package, removes that package. This removal is, however, not complete: all of the configuration files, maintainer scripts, log files (system logs) and other user data handled by the package remain. That way disabling the program is easily done by uninstalling it, and it is still possible to quickly reinstall it with the same configuration. To completely remove everything associated with a package, use the -P or --purge option, followed by the package name.
Example 5.4. Removal and purge of the debian-cd package
# dpkg -r debian-cd(Reading database ... 15915 files and directories currently installed.)
Removing debian-cd (3.1.25) ...
# dpkg -P debian-cd(Reading database ... 15394 files and directories currently installed.)
Purging configuration files for debian-cd (3.1.25) ...
5.4.3. Querying dpkg's Database and Inspecting .deb Files
BACK TO BASICS Option syntax
Most options are available in a “long” version (one or more relevant words, preceded by a double dash) and a “short” version (a single letter, often the initial of one word from the long version, and preceded by a single dash). This convention is so common that it is a POSIX standard.
Before concluding this section, we will study dpkg options that query the internal database in order to obtain information. Giving first the long options and then corresponding short options (that will evidently take the same possible arguments) we cite --listfiles package (or -L), which lists the files installed by this package; --search file (or -S), which finds the package(s) containing the file; --status package (or -s), which displays the headers of an installed package; --list (or -l), which displays the list of packages known to the system and their installation status; --contents file.deb (or -c), which lists the files in the Debian package specified; --info file.deb (or -I), which displays the headers of this Debian package.
CAUTIONdpkg --search and merged /usr
For various reasons, Debian now installs by default a few top-level directories as symlinks to their counterparts below /usr. For instance, /bin, /sbin and /lib are now symlinks to, respectively, /usr/bin, /usr/sbin and /usr/lib.
While this does provide desirable benefits, it can also be a source of confusion. For example, when you query dpkg which package is owning a given file, it will only be able to answer when you ask for its original path:
$ dpkg --search /bin/mount
mount: /bin/mount
$ dpkg --search /usr/bin/mount
dpkg-query: no path found matching pattern /usr/bin/mount
$ dpkg --search /bin/apt
dpkg-query: no path found matching pattern /bin/apt
$ dpkg --search /usr/bin/apt
apt: /usr/bin/apt
Example 5.5. Various queries with dpkg
$ dpkg -L base-passwd/.
/usr
/usr/sbin
/usr/sbin/update-passwd
/usr/share
/usr/share/base-passwd
/usr/share/base-passwd/group.master
/usr/share/base-passwd/passwd.master
/usr/share/doc
/usr/share/doc/base-passwd
/usr/share/doc/base-passwd/README
/usr/share/doc/base-passwd/changelog.gz
/usr/share/doc/base-passwd/copyright
/usr/share/doc/base-passwd/users-and-groups.html
/usr/share/doc/base-passwd/users-and-groups.txt.gz
/usr/share/doc-base
/usr/share/doc-base/users-and-groups
/usr/share/lintian
/usr/share/lintian/overrides
/usr/share/lintian/overrides/base-passwd
/usr/share/man
/usr/share/man/de
/usr/share/man/de/man8
/usr/share/man/de/man8/update-passwd.8.gz
/usr/share/man/es
/usr/share/man/es/man8
/usr/share/man/es/man8/update-passwd.8.gz
/usr/share/man/fr
/usr/share/man/fr/man8
/usr/share/man/fr/man8/update-passwd.8.gz
/usr/share/man/ja
/usr/share/man/ja/man8
/usr/share/man/ja/man8/update-passwd.8.gz
/usr/share/man/man8
/usr/share/man/man8/update-passwd.8.gz
/usr/share/man/pl
/usr/share/man/pl/man8
/usr/share/man/pl/man8/update-passwd.8.gz
/usr/share/man/ru
/usr/share/man/ru/man8
/usr/share/man/ru/man8/update-passwd.8.gz
$ dpkg -S /bin/datecoreutils: /bin/date
$ dpkg -s coreutilsPackage: coreutils
Essential: yes
Status: install ok installed
Priority: required
Section: utils
Installed-Size: 15719
Maintainer: Michael Stone <mstone@debian.org>
Architecture: amd64
Multi-Arch: foreign
Version: 8.30-3
Pre-Depends: libacl1 (>= 2.2.23), libattr1 (>= 1:2.4.44), libc6 (>= 2.28), libselinux1 (>= 2.1.13)
Description: GNU core utilities
This package contains the basic file, shell and text manipulation
utilities which are expected to exist on every operating system.
.
Specifically, this package includes:
arch base64 basename cat chcon chgrp chmod chown chroot cksum comm cp
csplit cut date dd df dir dircolors dirname du echo env expand expr
factor false flock fmt fold groups head hostid id install join link ln
logname ls md5sum mkdir mkfifo mknod mktemp mv nice nl nohup nproc numfmt
od paste pathchk pinky pr printenv printf ptx pwd readlink realpath rm
rmdir runcon sha*sum seq shred sleep sort split stat stty sum sync tac
tail tee test timeout touch tr true truncate tsort tty uname unexpand
uniq unlink users vdir wc who whoami yes
Homepage: http://gnu.org/software/coreutils
$ dpkg -l 'b*'Desired=Unknown/Install/Remove/Purge/Hold
| Status=Not/Inst/Conf-files/Unpacked/halF-conf/Half-inst/trig-aWait/Trig-pend
|/ Err?=(none)/Reinst-required (Status,Err: uppercase=bad)
||/ Name Version Architecture Description
+++-====================-===============-===============-==================================================
un backupninja <none> <none> (no description available)
un backuppc <none> <none> (no description available)
un baobab <none> <node> (no description available)
un base <none> <none> (no description available)
un base-config <none> <none> (no description available)
ii base-files 11 amd64 Debian base system miscellaneous files
ii base-passwd 3.5.46 amd64 Debian base system master password and group files
ii bash 5.0-4 amd64 GNU Bourne Again SHell
[..]
$ dpkg -c /var/cache/apt/archives/gnupg-utils_2.2.12-1_amd64.debdrwxr-xr-x root/root 0 2018-12-15 02:17 ./
drwxr-xr-x root/root 0 2018-12-15 02:17 ./usr/
drwxr-xr-x root/root 0 2018-12-15 02:17 ./usr/bin/
-rwxr-xr-x root/root 3516 2018-12-15 02:17 ./usr/bin/gpg-zip
-rwxr-xr-x root/root 866256 2018-12-15 02:17 ./usr/bin/gpgcompose
-rwxr-xr-x root/root 30792 2018-12-15 02:17 ./usr/bin/gpgparsemail
-rwxr-xr-x root/root 84432 2018-12-15 02:17 ./usr/bin/gpgsplit
-rwxr-xr-x root/root 154952 2018-12-15 02:17 ./usr/bin/gpgtar
-rwxr-xr-x root/root 166568 2018-12-15 02:17 ./usr/bin/kbxutil
-rwxr-xr-x root/root 1081 2017-08-28 12:22 ./usr/bin/lspgpot
-rwxr-xr-x root/root 2194 2018-11-18 23:37 ./usr/bin/migrate-pubring-from-classic-gpg
-rwxr-xr-x root/root 121576 2018-12-15 02:17 ./usr/bin/symcryptrun
-rwxr-xr-x root/root 18424 2018-12-15 02:17 ./usr/bin/watchgnupg
drwxr-xr-x root/root 0 2018-12-15 02:17 ./usr/sbin/
-rwxr-xr-x root/root 3075 2018-12-15 02:17 ./usr/sbin/addgnupghome
-rwxr-xr-x root/root 2217 2018-12-15 02:17 ./usr/sbin/applygnupgdefaults
drwxr-xr-x root/root 0 2018-12-15 02:17 ./usr/share/
drwxr-xr-x root/root 0 2018-12-15 02:17 ./usr/share/doc/
[...]
$ dpkg -I /var/cache/apt/archives/gnupg-utils_2.2.12-1_amd64.deb new Debian package, version 2.0.
size 857408 bytes: control archive=1844 bytes.
1564 bytes, 32 lines control
1804 bytes, 28 lines md5sums
Package: gnupg-utils
Source: gnupg2
Version: 2.2.12-1
Architecture: amd64
Maintainer: Debian GnuPG Maintainers <pkg-gnupg-maint@lists.alioth.debian.org>
Installed-Size: 1845
Depends: libassuan0 (>= 2.0.1), libbz2-1.0, libc6 (>= 2.25), libgcrypt20 (>= 1.8.0), libgpg-error0 (>= 1.26-2~), libksba8 (>= 1.3.4), libreadline7 (>= 6.0), zlib1g (>= 1:1.1.4)
Recommends: gpg, gpg-agent, gpgconf, gpgsm
Breaks: gnupg (<< 2.1.21-4), gnupg-agent (<< 2.1.21-4)
Replaces: gnupg (<< 2.1.21-4), gnupg-agent (<< 2.1.21-4)
Section: utils
Priority: optional
Multi-Arch: foreign
Homepage: https://www.gnupg.org/
Description: GNU privacy guard - utility programs
GnuPG is GNU's tool for secure communication and data storage.
.
This package contains several useful utilities for manipulating
OpenPGP data and other related cryptographic elements. It includes:
.
* addgnupghome -- create .gnupg home directories
* applygnupgdefaults -- run gpgconf --apply-defaults for all users
* gpgcompose -- an experimental tool for constructing arbitrary
sequences of OpenPGP packets (e.g. for testing)
* gpgparsemail -- parse an e-mail message into annotated format
* gpgsplit -- split a sequence of OpenPGP packets into files
* gpgtar -- encrypt or sign files in an archive
* kbxutil -- list, export, import Keybox data
* lspgpot -- convert PGP ownertrust values to GnuPG
* migrate-pubring-from-classic-gpg -- use only "modern" formats
* symcryptrun -- use simple symmetric encryption tool in GnuPG framework
* watchgnupg -- watch socket-based logs
[..]
GOING FURTHER Comparison of versions
Since dpkg is the program for handling Debian packages, it also provides the reference implementation of the logic of comparing version numbers. This is why it has a --compare-versions option, usable by external programs (especially configuration scripts executed by dpkg itself). This option requires three parameters: a version number, a comparison operator, and a second version number. The different possible operators are lt (strictly less than), le (less than or equal to), eq (equal), ne (not equal), ge (greater than or equal to), and gt (strictly greater than). If the comparison is correct, dpkg returns 0 (success); if not, it gives a non-zero return value (indicating failure).
Note the unexpected failure of the last comparison: for dpkg, pre, usually denoting a pre-release, has no particular meaning, and this program compares the alphabetic characters in the same way as the numbers (a < b < c ...), in alphabetical order. This is why it considers “0pre3” to be greater than “0”. When we want a package's version number to indicate that it is a pre-release, we use the tilde character, “~”:
dpkg keeps a log of all of its actions in /var/log/dpkg.log. This log is extremely verbose, since it details every one of the stages through which packages handled by dpkg go. In addition to offering a way to track dpkg's behavior, it helps, above all, to keep a history of the development of the system: one can find the exact moment when each package has been installed or updated, and this information can be extremely useful in understanding a recent change in behavior. Additionally, all versions being recorded, it is easy to cross-check the information with the changelog.Debian.gz for packages in question, or even with online bug reports.
5.4.5. Multi-Arch Support
All Debian packages have an Architecture field in their control information. This field can contain either “all” (for packages that are architecture independent) or the name of the architecture that it targets (like “amd64”, “armhf”, …). In the latter case, by default, dpkg will only accept to install the package if its architecture matches the host's architecture as returned by dpkg --print-architecture.
This restriction ensures that users do not end up with binaries compiled for an incorrect architecture. Everything would be perfect except that (some) computers can run binaries for multiple architectures, either natively (an “amd64“ system can run “i386” binaries) or through emulators.
5.4.5.1. Enabling Multi-Arch
dpkg's multi-arch support allows users to define “foreign architectures” that can be installed on the current system. This is simply done with dpkg --add-architecture like in the example below. There is a corresponding dpkg --remove-architecture to drop support of a foreign architecture, but it can only be used when no packages of this architecture remain.
# dpkg --print-architectureamd64
# dpkg --print-foreign-architectures# dpkg -i gcc-8-base_8.3.0-6_armhf.debdpkg: error processing archive gcc-8-base_8.3.0-6_armhf.deb (--install):
package architecture (armhf) does not match system (amd64)
Errors were encountered while processing:
gcc-8-base_8.3.0-6_armhf.deb
# dpkg --add-architecture armhf# dpkg --add-architecture armel# dpkg --print-foreign-architecturesarmhf
armel
# dpkg -i gcc-8-base_8.3.0-6_armhf.deb(Reading database ... 14319 files and directories currently installed.)
Preparing to unpack gcc-8-base_8.3.0-6_armhf.deb ...
Unpacking gcc-8-base:armhf (8.3.0-6) ...
Setting up gcc-8-base:armhf (8.3.0-6) ...
# dpkg --remove-architecture armhfdpkg: error: cannot remove architecture 'armhf' currently in use by the database
# dpkg --remove-architecture armel# dpkg --print-foreign-architecturesarmhf
NOTE APT's multi-arch support
APT will automatically detect when dpkg has been configured to support foreign architectures and will start downloading the corresponding Packages files during its update process.
Foreign packages can then be installed with apt install package:architecture.
IN PRACTICE Using proprietary i386 binaries on amd64
There are multiple use cases for multi-arch, but the most popular ones are the possibility to execute (sometimes proprietary) 32 bit binaries (i386) on 64 bit systems (amd64), and the possibility to cross-compile software for a platform or an architecture different from the host one.
5.4.5.2. Multi-Arch Related Changes
To make multi-arch actually useful and usable, libraries had to be repackaged and moved to an architecture-specific directory so that multiple copies (targeting different architectures) can be installed alongside. Such updated packages contain the “Multi-Arch: same” header field to tell the packaging system that the various architectures of the package can be safely co-installed (and that those packages can only satisfy dependencies of packages of the same architecture). The most important libraries have been converted since the introduction of multi-arch in Debian 7 Wheezy, but there are many libraries that will likely never be converted unless someone specifically requests it (through a bug report for example).
$ dpkg -s gcc-8-base
dpkg-query: error: --status needs a valid package name but 'gcc-8-base' is not: ambiguous package name 'gcc-8-base' with more than one installed instance
Use --help for help about querying packages.
$ dpkg -s gcc-8-base:amd64 gcc-8-base:armhf | grep ^Multi
Multi-Arch: same
Multi-Arch: same
$ dpkg -L libgcc1:amd64 |grep .so
/lib/x86_64-linux-gnu/libgcc_s.so.1
$ dpkg -S /usr/share/doc/gcc-8-base/copyright
gcc-8-base:amd64, gcc-8-base:armhf: /usr/share/doc/gcc-8-base/copyright
It is worth noting that Multi-Arch: same packages must have their names qualified with their architecture to be unambiguously identifiable. They also have the possibility to share files with other instances of the same package; dpkg ensures that all packages have bit-for-bit identical files when they are shared. Last but not least, all instances of a package must have the same version. They must thus be upgraded together.
Multi-Arch support also brings some interesting challenges in the way dependencies are handled. Satisfying a dependency requires either a package marked “Multi-Arch: foreign” or a package whose architecture matches the one of the package declaring the dependency (in this dependency resolution process, architecture-independent packages are assumed to be of the same architecture than the host). A dependency can also be weakened to allow any architecture to fulfill it, with the package:any syntax, but foreign packages can only satisfy such a dependency if they are marked “Multi-Arch: allowed”.
�������������������������������������������������������������������������������������������������������������������������������������������������������������������������������������������������������������������������reference/Ralink_RT5370.html������������������������������������������������������������������������0000664�0000000�0000000�00000025170�14613204507�0016055�0����������������������������������������������������������������������������������������������������ustar�00root����������������������������root����������������������������0000000�0000000������������������������������������������������������������������������������������������������������������������������������������������������������������������������
WifiDocs/Device/Ralink_RT5370 - Community Help Wiki
I had configure usb Ralink RT5370 802.11b/g/n adapter in Ubuntu 12.04.
lsusb: ID 148f:5370 Ralink Technology, Corp. RT5370 Wireless Adapter
I use rt2800usb driver - it seem to be better then the orig from Ralink - more features, no (???) logs, ... But this driver do no know this particular usb ID yet -> we must configure udev.
WifiDocs/Device/Ralink_RT5370 (last edited 2013-01-31 21:53:10 by kapetr)
��������������������������������������������������������������������������������������������������������������������������������������������������������������������������������������������������������������������������������������������������������������������������������������������������������������������������������������������������������������������������������������������������������reference/The_Spectrwm_Window_Manager.html����������������������������������������������������������0000664�0000000�0000000�00000031715�14613204507�0021300�0����������������������������������������������������������������������������������������������������ustar�00root����������������������������root����������������������������0000000�0000000������������������������������������������������������������������������������������������������������������������������������������������������������������������������
The Spectrwm Window Manager
The spectrwm window manager
The spectrwm
window manager was inspired by xmonad and dwm. It shares several
characteristics of dwm and has several nice features of its own, things
that I always had to add to dwm with scripts or patches. The downside of
that is that it's a bit bigger, with more dependencies, than dwm, but even
on an old machine, it would be considered a very lightweight and fast
window manager.
It was originally named scrotwm. Whether the humor was amusing, infantile,
or both can be left to the judgement of the reader. Some people were
offended and eventually the name was changed to spectrwm.
After installation, a default spectrwm.conf is created. If building from
source, it will be in the spectrwm directory created after untarring the
tarball. In Ubuntu based systems, as well as Fedora, it's /etc/spectrwm.conf.
In FreeBSD it's /usr/local/etc/spectrwm.conf
Copy this file to your home directory.
cd
cp /etc/spectrwm.conf .spectrwm.conf
Note the period before the name in your home directory. That's making it a
hidden file.
The file is fairly straightforward and has pretty sane defaults. The key
bindings are described in the man page. Between the descriptions in the
file and the man page, even the newcomer shouldn't have much trouble. This
page is to just touch upon some things said newcomer may overlook.
Like many tiling window managers, Mod1 (the alt key), shift, and return
launches an xterm by default. Mod1 and p will launch dmenu, which, if you're
not familiar with it, is a very handy little application--it will appear by
default, at the top of the screen and you can enter the name of an
application into it. It has automatic tab completion, so if you enter the
first few letters of thunderbird, for example, it will complete the
word--you can then hit enter and it will launch thunderbird.
The first window, on the left, is the master window. As you add other
windows, they will open in a stack on the right, automatically sizing
themselves so that they can fit. To swap a window with the master window,
Mod1 and return will put the focused window on the left, as the main
window. So, you might have a browser on the left and two or three
terminals on the right. If you're doing something involved in one terminal
and need more top to bottom space, give it focus, hit Mod1 and return, and
it's in the master window. Some prefer that new windows open in the master
position, and all currently open windows get moved to the stack column.
(This is the default behavior of dwm, for example). In such a case, find
the line in your $HOME/.spectrm.conf that reads
Hitting Mod1+l (lower case L) will expand the master window to the right.
Hitting Mod1+h will shrink it to the left, or expand the stack on the
right, depending upon your point of view. Those used to dwm will find the
default keybindings fairly similar--using h and l to expand and contract
the master are similar to movement keys in the vi editor. To focus on the
next window use Mod1+j and Mod1+k moves to the previous window.
All of the above is common on many tiling window managers, but may help the
novice as a 1 minute tutorial. Many people choose to customize their
window manager, and this is where spectrwm shines, with a plain text
configuration file and the ability to reload without restarting.
Let's start with the status bar. The default bar has more information than
I need or want. I want the title of the focused window, the number of the
workspace, and the date. Depending upon your version of spectrwm, you may
have to manually add bar_format to your $HOME/.spectrwm.conf. A full
description of the format is in the man page. To get what I want I use
bar_format =[+I] %R %F +C
The [+I] gives me the workspace number, and %R %F are the date format I
prefer, giving me a time and date like 14:20 2014-11-14 (if it was 14:20 on
the 14th of November in 2014, the day I'm writing this). The +C gives me
the window class, which can be useful if I have a bunch of windows open.
Spectrwm does identify the focused window by default, by having a 1 pixel
red outline around it, but it can be useful to see it in the status bar as
well. Some people prefer to have +W as well, for the window name. As far
as I can see, if you have +C, +W or both in your bar_format line, you can
leave the window_class_enabled and window_name_enabled at their default
value of off. I haven't tested this too much, but it does seem that even
if you turn them on, if you don't have the +C or +W in your bar_format
line, you won't see a window name (or class) in the status bar.
One nice feature of spectrwm is that once you've changed your config file,
MOD+q will reload it so that you can see your changes. (To quit spectrwm
entirely use MOD+Shift+q). So, after making a change, hit MOD+q, and see
if you like it.
A common change is the mod key. The default is Mod1, the alt key.
Many people, including myself, prefer Mod4, the Windows key on a Windows
keyboard, also known as Super. In your $HOME/.spectrwm.conf file, look for
the line (like most defaults, it is commented out)
# modkey = Mod1
Change it Mod4 to have the Windows key be your usual mod key.
It has certain default programs--for example, the default terminal is
xterm . You will see lines in your spectrwm.conf file like
program[term] = xterm
If you preferred urxvt, you can change xterm to urxvt.
Its default binding is MOD+Shift+Return. To disable any default binding,
look for the section Validated default programs. In the section below it,
you can see examples of how to disable validation, just uncomment the
default bind keys. In practice, if you specify another binding, this
probably isn't necessary. For example, I prefer to open dmenu with
MOD+Shift+p as I use MOD+p for firefox--a habit formed long, long ago, when
it was called phoenix. Even if I don't uncomment the default MOD+p for
dmenu, MOD+p still opens firefox if I have it defined in my
.spectrwm.conf.
To bind a program to a key, you must first define it with a program line.
For example, if I want to open firefox with a key command, I must first
define the program. They give an example of firefox, opening it to the
spectrwm home page. Suppose I just want open the opera browser with the
key combo of MOD+o. I first give it a name with a program line, then open
it.
program[opera] = opera
bind[opera] = Mod+o
The program line is necessary. It can be quite useful to, for example, open
a program with specificed defaults. For example, if I want open irssi in a
specifically colored terminal
program[irc] = urxvt -bg black -fg white -e 'irssi -c irc.freenode.net'
bind[irc] = MOD+i
(Either MOD or Mod will work.)
One very nice feature of spectrwm is that one can quickly, with the
keyboard, toggle a window from tiled to floating and then, if it's
floating, move it around and resize it. The keyboard shortcuts are in the
man page, and can be added or changed in $HOME/.spectrwm.conf. MOD+t
toggles the window to floating--then MOD+] moves it to right, MOD+[ to the
left. MOD+- (the minus sign) shrinks the window's width. MOD+_ (the
underscore, done with MOD+Shift+ the -_ key) shrinks the height. MOD+=
increases the width and adding the Shift key, so that it's MOD++ (the plus
sign) increases the height.
At work, I have 4 1600x900 monitors. I have NVidia cards and use the
nvidia-settings program to make it run in Xinerama, one big screen. Using
dwm, it seems to recognize screen boundries by default. With spectrwm,
this should be configured in your .spectrwm.conf You will see a default
commented out entry
region =screen[1]:1280x1024+0+0
region =screen[1]:1280x1024+1280+0
This refers to the screen resolution, X (left to right) and Y (top to
bottom) positions. So, as all my monitors are 1600x900 I use
region =screen[1]:1600x900+0+0
region =screen[1]:1600x900+1600+0
region =screen[1]:1600x900+0+900
region =screen[1]:1600x900+1600+900
I'm not sure what that first [1] is for. The man page says idx but at any
rate, in my setup, it stays at [1] for all of them. The first monitor, the
upper left is at 0 and 0 that is, the far left and top edge of both X and Y
axis. The second one is to the right, so it's at 1600 on the left to right
axis and 0 on the Y axis. The third one is bottom left and so it's 0 for
left to right and 900 on the Y axis and the last one, the bottom right,
starts at 1600 on the left right axis and 900 at the up down axis. Some
people may want larger regions, in which case they would make something
like 3200x900+0+0. (To make one huge screen, I guess it would be 3200x1800,
but in my case, I want each monitor to be a separate region.)
Each screen, when I do it this way, unlike dwm, has a different workspace
number. If I have, for example firefox open on the top left, and
thunderbird on the upper right, then, on the lower left, have something
else, and then use MOD+2 on the lower left, it will now show me workspace
2, in other words, what was on the upper right monitor. The former
workspace 2 will also change numbers. I've never actually kept track of
this, as it only happens to me by mistake--generally what I want to do is
open a fresh workspace, meaning I should use MOD+5, and hit 2 by mistake.
Putting it back, by, while focused on the lower left monitor, doing
MOD+3, puts all workspaces back to normal. MOD+Shift+number will moved a
focused window to the workspace indicated by the number. In other words, if
I want to move a terminal from workspace 3 to workspace 5, I focus on the
terminal, hit MOD+Shift+5 and the terminal will now be on workspace 5.
With multiple monitors, you have to watch this--MOD+number won't switch
focus to the screen with workspace 2, it will switch workspace 2 to the
currently focused monitor. To move focus to a different monitor, the
default key combination is MOD+<number> with the number being the
keypad,rather than the number keys, which, as mentioned will switch the
workspace within the monitor. The command is rg_n, with n referring to the
number. One can also use rg_next and rg_previous. If you want, for
example, to use MOD+N and MOD+P for next and previous regions (as MOD+p
with lower case is already used)
On FreeBSD, I've found that one has to install x11/fonts/fonts-misc-misc.
Otherwise, if I try to start spectrwm with startx, it fails to start,
complaining about missing fonts. (I installed spectrwm with pkg, this may
not be true with ports. On Fedora, I wasn't able to get the
rpm to work in 21 beta, latest F23 (in TC status as I write this),
everything is fine. On older versions If I installed
the git version, it worked as expected.
In CentOS 6,x I'm not able to get anything later than version 2.5.1 to
compile. To get it to work, after extracting the tarball, I have to edit
the linux/Makefile. There is a line that begins LDADD+=. To get it to
compile I have to edit it so that it reads
If your browser broke that, it should be on one line. In version 2.6 and
above, the linux/Makefile doesn't have that line. The Makefile in the main
directory has an LDADD line, but editing that didn't enable me to compile
it. I should add that I have no knowledge of C, and it's possible that
there's an easy fix, but with my relatively simple needs, version 2.5.1 is
fine.